Access via Desktop
-
- How do I access my customer computer remotely?
- How do I schedule a remote support session for my customers?
- How do I edit or reschedule an already scheduled remote support session?
- How do I share my screen for remote support?
- Where can I view the sessions and their status?
- How do I close a remote session?
- Can I transfer files between remote and local computers during an ongoing remote session?
- Can I adjust my customer's remote screen during an ongoing session?
- How can I switch monitor screens of my remote computer?
- Can I chat with my customer during a remote session?
- How can I access Whiteboard?
- Can I record an ongoing remote session?
- Can I switch to the admin mode during an ongoing session?
Technician
Functions
Technicians can create a remote session to access a customer's computer to provide remote assistance. A customer's computer can be accessed in two ways, using instant and scheduled sessions.
To create an instant remote session,
- Launch the HelpDesk application and log in.
- Select 'Access customer device'.
- Enter the customer's email address and click 'Start Now'.

Note: If you enter the email address, the customer will receive an email invite to initiate the remote session.
Alternatively, click 'Start Now' and copy the session link/code to share with the customer to invite them. You can also invite via email or SMS.
Once the customer accepts the invite, click 'Join' to download the setup and initiate the remote session.
Technicians can schedule remote support sessions with the customers. While scheduling the session, you can select a reminder timing and set a reminder for the customer to join the session.
To schedule a remote session,
- Launch the HelpDesk application and log in.
- Select 'Access customer device' and click 'Schedule'.
- In the Schedule screen, enter the email address, time, date, topic, and set a reminder.
- Click 'Schedule'. The customer will receive an email invite with the details of the session.

- Once the customer clicks 'Join Session', they can download the setup and initiate the remote session.
Alternatively, click 'Start' next to the scheduled session. Share the installation link with the customer to set up the remote session or invite via email or SMS.


To edit or reschedule a session,
- Under 'Session', click the
 icon next to the scheduled session.
 - Select 'Edit' from the dropdown menu.

- In the Edit screen, make the required changes in respective fields.
- Click 'Update'.

The customer will receive an updated email invite once the remote session is rescheduled.
To cancel a scheduled remote session, select 'Cancel' from the dropdown menu and click 'Yes' in the confirmation popup.

Technicians can share their screen with customers for remote demo. You can share your screen in two ways, using instant and scheduled sessions.
To create an instant screen sharing session,
- Launch the HelpDesk application and log in.
- Select 'Share my screen' and click 'Start Now'.

- The connection screen will appear. A setup will be downloaded to your system. Launch this application to share your screen.
- Share the link, code, or send an email invite to the customer to join the session.
To schedule a screen sharing session,
- Select 'Share my screen' and click 'Schedule'.

- In the Schedule screen, enter the email address, time, date, topic, and set a reminder.

- Click 'Schedule'. The customer will receive an email invite with the details of the screen sharing session.
- Click 'Start' next to the scheduled session. A setup will be downloaded to your system. Launch this application to share your screen.

- Share the link, code, or send an email invite to the customer to join the session.

- Once the customer clicks 'Join Session' and enters the session code and password they can join the remote session.
You can view the list of sessions and session details in the home screen of the HelpDesk application.
- Under 'Session', the following options are available:
- Date and time of the session
- Topic/query to be covered in the session
- Type of session, either remote support or screen share
- Customer detail and session status
- Technician option to initiate or end the session
- Under 'History', view resolved sessions.

- Under 'Favorites', all the important sessions that have been marked in 'History' will be displayed.

Note: Sessions with a valid customer email address can only be marked as Favorites.
To close the session,
- Launch the HelpDesk application and log in.
- Click against a finished session that you want to resolve.
- Click 'Resolve'.

- Click 'Yes' in the popup confirmation. The session will be resolved.
Yes, you can transfer files and folders between your local and remote computer.
To transfer files/folders,
- Launch the HelpDesk application and log in.
- Establish a remote connection with a remote computer.
- Click
 . The File Transfer window appears.
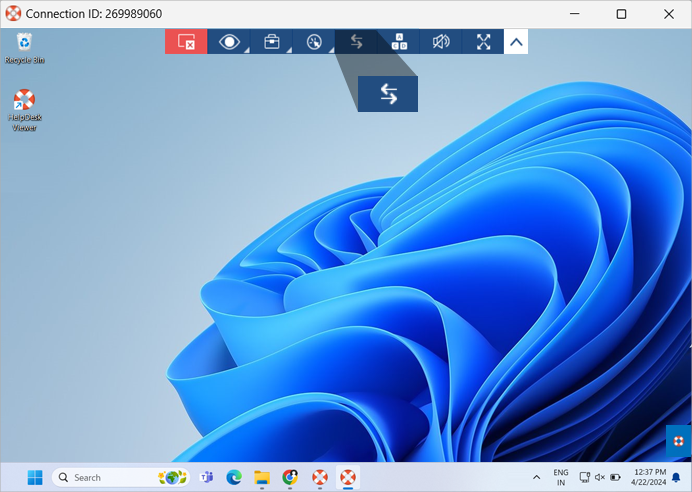
- To send files / folders from your local to remote computer, from the local computer drop-down menu, select files / folders you want to send, and click 'Send'.
- To receive files / folders from the remote to your local computer, from the remote computer drop-down menu, select files / folders, and click 'Receive'.
The progress of the transfer is shown in the 'Job Queue' section.
Yes, you can adjust the remote computer's screen.
To adjust the screen,
- Launch the HelpDesk application and log in.
- Establish connection with a remote computer.
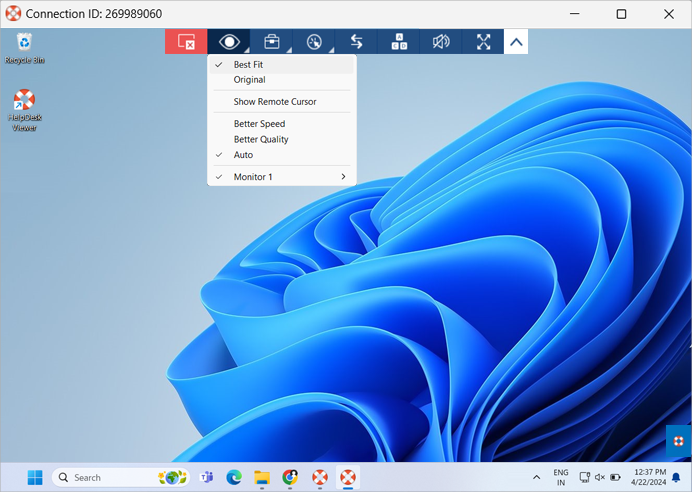
- Click
 and select 'Best Fit' to fit the screen to your local computer window.
- To enter a full-screen mode, click
 .
.
To adjust the screen resolution of multiple monitors, hover over the monitor you wish to change the resolution and select the resolution.
You can also adjust the speed of the screen updates and quality at which the remote screen updates are transmitted with the 'Better Speed' and 'Better Quality' options respectively. Click 'Auto' for the default setting that controls the speed and quality of remote sessions.
To switch between monitors,
- Launch the HelpDesk application and log in.
- Establish connection with a remote computer.
- Click
 and select the monitor that you wish to view.
Yes, to chat with the customer at the remote end,
- Launch the HelpDesk application and log in.
- Establish connection with a remote computer.
- Click
 and 'Chat'.
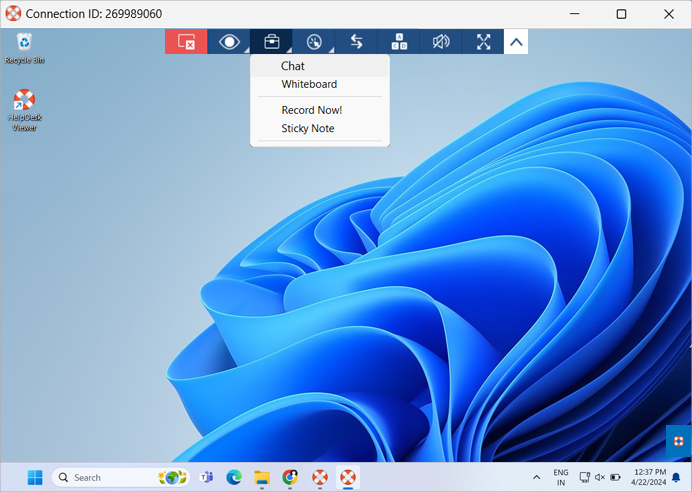
Type your message in the chat window and click 'Send'.
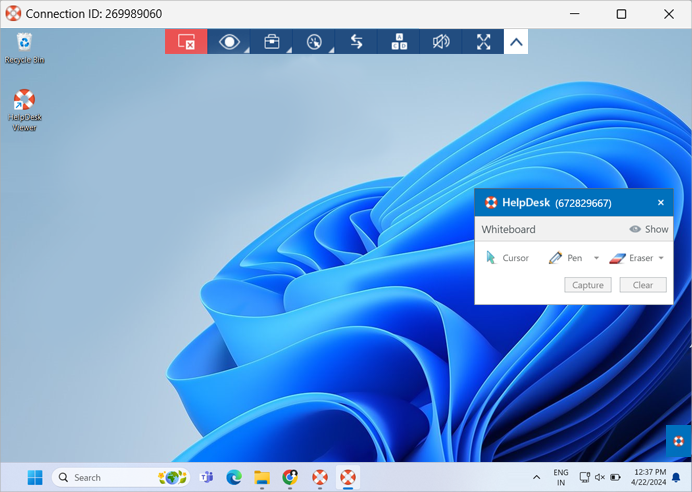
To access whiteboard,
- Launch the HelpDesk application and log in.
- Establish connection with your customer's remote computer.
- Click
 and 'Whiteboard'.
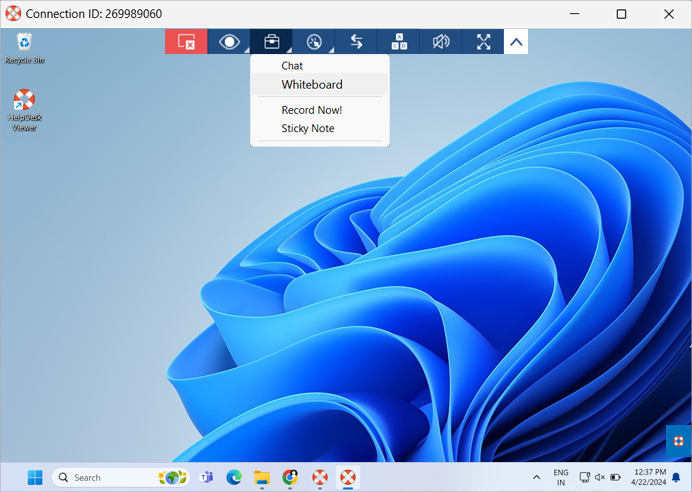
Alternatively, Click ![]() on the desktop notification. The whiteboard panel will pop up on the screen.
on the desktop notification. The whiteboard panel will pop up on the screen.
Yes, you can record a remote session in progress.
To start recording,
- Launch the HelpDesk application and log in.
- Establish connection with a remote computer.
- Click
 and 'Record Now'.
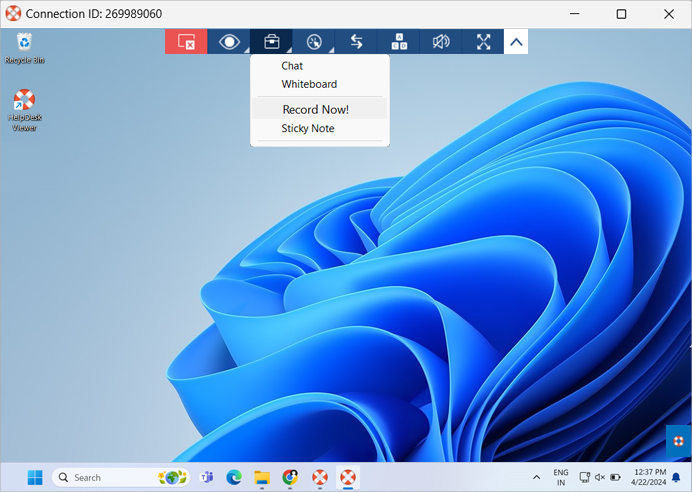
- The recording will be started.
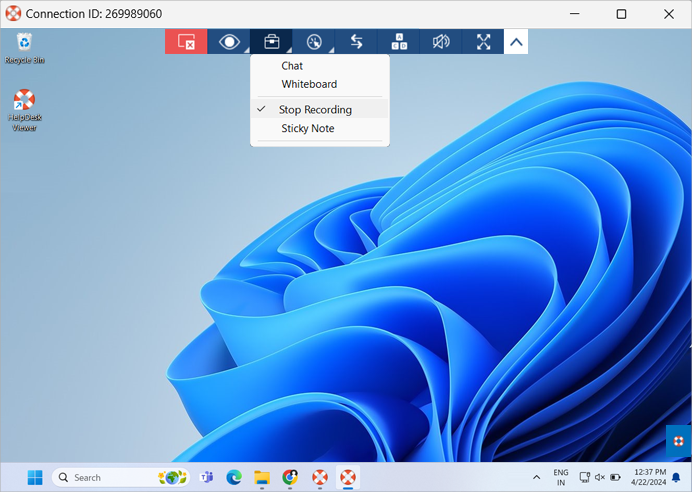
To stop recording, click ![]() and 'Stop Recording'. You can access the recordings in 'Remote Access Logs'.
and 'Stop Recording'. You can access the recordings in 'Remote Access Logs'.
Yes, you can switch from non-admin mode to admin mode during an ongoing session, without disconnecting the session.
To switch to admin mode:
- Click
 and select 'Reconnect as Admin'.
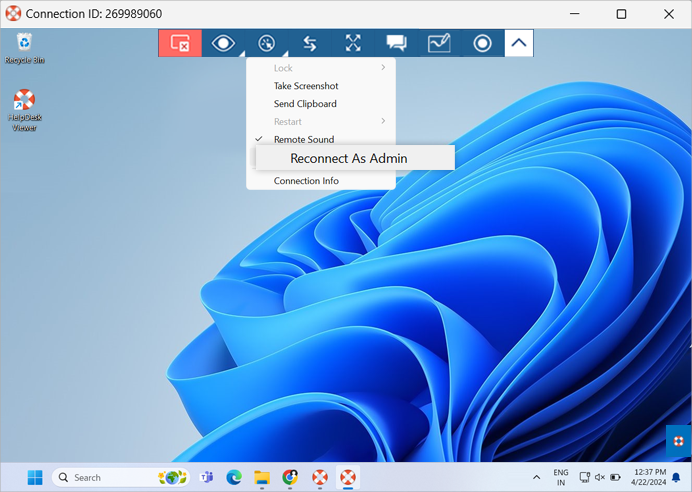
- You will be prompted to enter credentials to access Admin privileges.
- Choose a method to enter credentials:
- Enter credentials by technician (You): Enter the Windows admin credentials for the remote computer and click 'OK'. After the remote user confirms authorization, you will be able to access the remote computer as an admin.
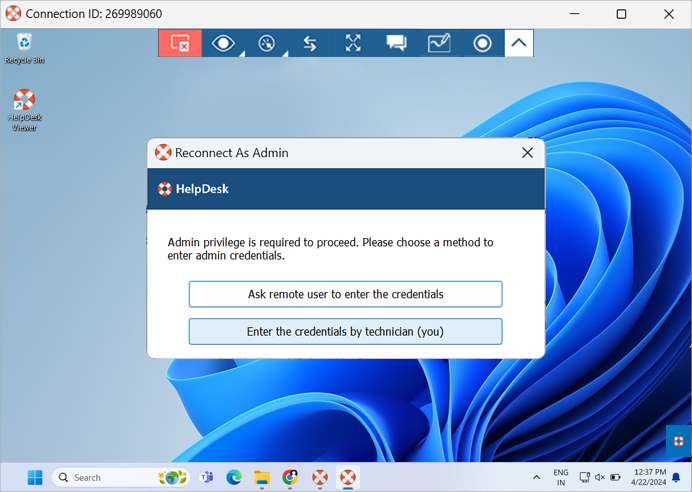
- Enter credentials by remote user: The remote user will be notified with a confirmation message. Wait for the remote user to confirm. Once the remote user confirms authorization, you will be able to access the remote computer as an admin.
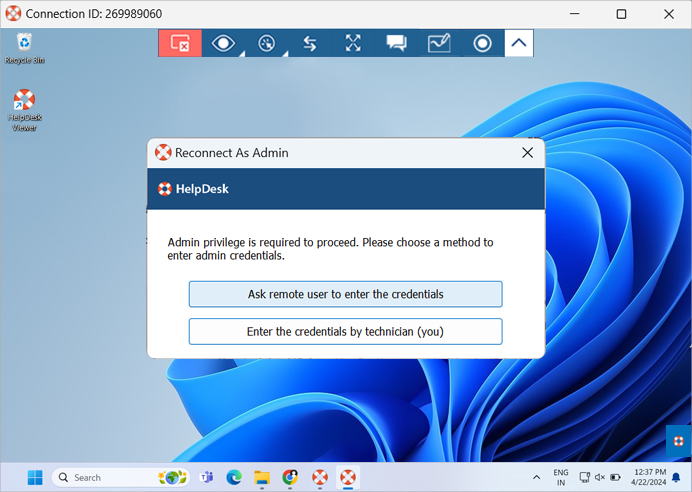
- Enter credentials by technician (You): Enter the Windows admin credentials for the remote computer and click 'OK'. After the remote user confirms authorization, you will be able to access the remote computer as an admin.
